From box to
battle-ready in 4 steps.
Everything below runs on Windows 10/11 with the YSC control panel — no programmer, no disassembly, no code. Grab the driver from Downloads first, then follow the steps.
WIRINGWire it up
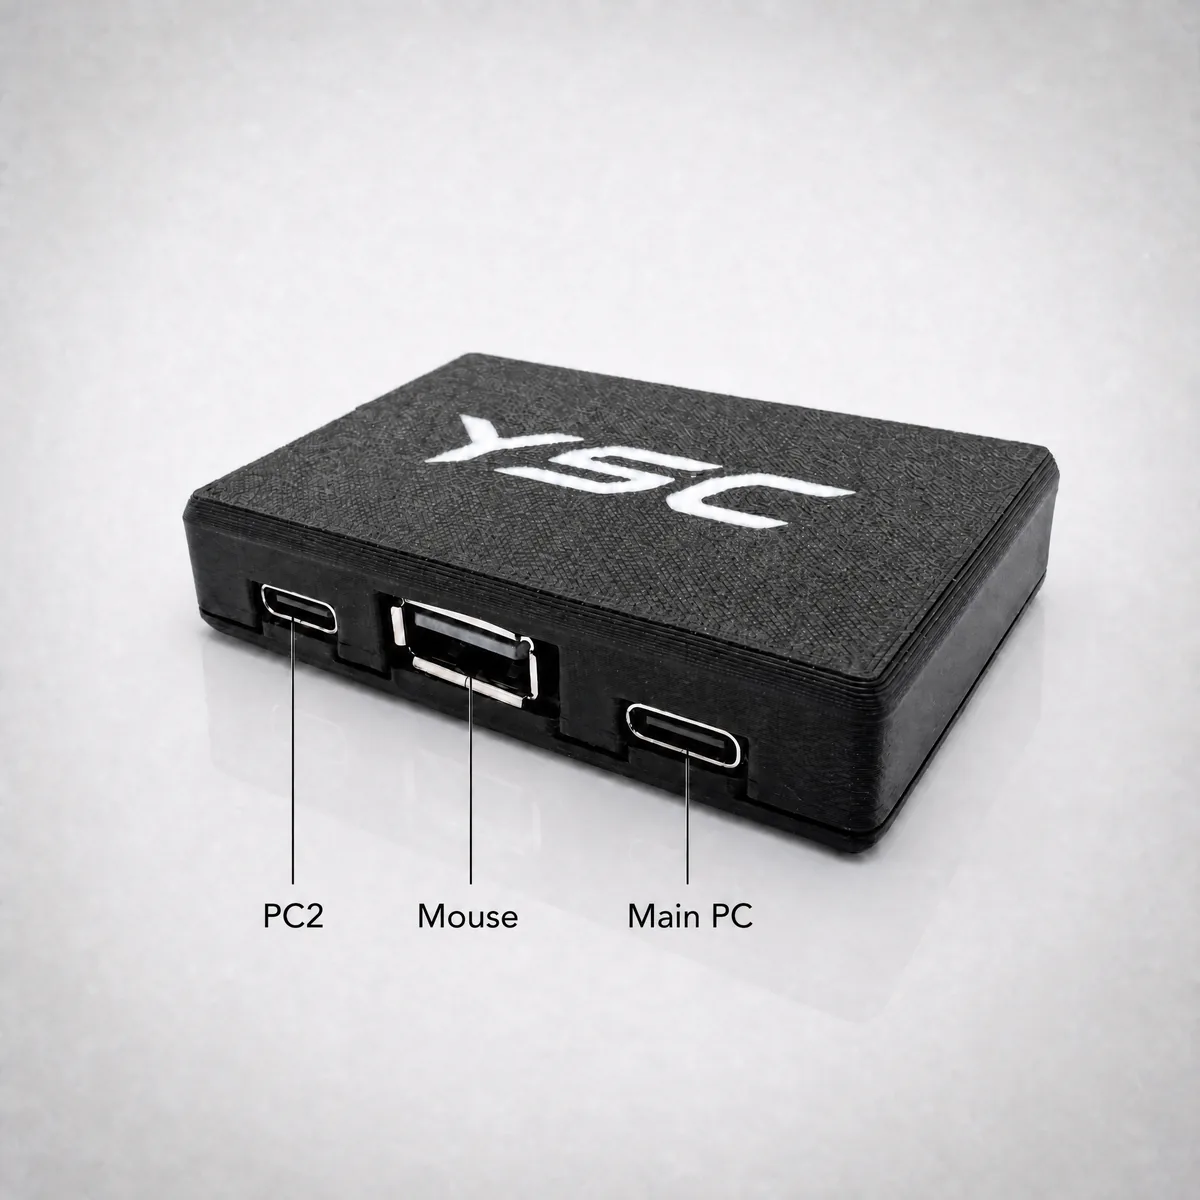
Follow Fig. 1 above. Plug your real mouse / keyboard / controller into the port marked MOUSE, then run a data cable from the port marked MAIN PC to your computer — that's the machine the box passes through to.
The top port marked PC2 is for an optional second PC: remote control over KmNet, or firmware flashing from another machine. Not needed for everyday use.
DRIVER + LINKInstall & connect
Install the YSC 8K Driver v1.11.0 and open it. Once wired, the PC gains one extra mouse (the box itself) plus one serial COM port — that COM port is how the control panel talks to the box.
- Open the Serial Connection panel, pick the box's COM port, press Connect
- Verify: open Monitor, press Start Upload, move your mouse — data should stream in
- Or open the Docs panel's command tester and send km.version() — the box should answer
TUNINGConfigure & save
Each feature lives in its own graphical panel — set values, press Save, done:
- Macro — 8 trigger-masked slots with randomized pulse timing
- Jitter — fire-triggered X/Y oscillation for spray patterns
- Mouse Curve — segmented movement profiles
- Gamepad Mapping — pad buttons → mouse buttons, mouse motion → stick
- KmNet — optional: drive the box from a second PC over the network, with self-test
FIRMWAREUpdate firmware
Open the 8K V2 Firmware Update panel. Press Refresh, select the side you want (Left first), then either Check Update for online download or Browse a local .bin file. Press Download & Flash / Flash Left — 5 to 15 seconds. Repeat on the other side. The two sides always flash separately.
V1: use the Firmware Update panel instead — same flow, single image.
Reading the status lamp: blue solid = normal · yellow blinking = flashing · green solid = done.
OPTIONALGamepad mapping
Plug a PS5 DualSense, Xbox One/Series, XInput or generic HID controller into the MOUSE-side USB port, open the Gamepad Mapping panel and flip the Enable switch — it persists in flash across reboots.
- Button rules — map any pad button to any mouse button; LT/RT get an analog threshold (default 128 = half press)
- Augment vs Replace — keep the original pad input alongside the mouse event, or swallow it entirely
- Motion → stick — set pixels-per-percent sensitivity, target stick, duration and X/Y inversion
- Export before flashing firmware, import after — configs survive everything else